Recent Posts

Thursday, April 29, 2010

Another DIY headboard


For some time, I'd had my eye on the Modern Velvet Headboard ($280) from Urban Outfitters, but I simply couldn't bring myself to spend $315, including shipping, on the thing. I'm not quite pleased with the quality of UO's materials (particularly the velvet they use), and since the headboard would be mostly just a decorative piece, it didn't seem like a sensible purchase. So what's a girl to do? DIY it of course!
It didn't seem like it would be a difficult project, and building my nailhead trim headboard myself would allow me to choose exactly the fabric I wanted, in addition to saving a bundle. So off to Home Depot and the fabric store I went! I picked a greenish gray German velvet to bring some contrast to my light bedding.
Here's are the supplies you'll need:
  • Piece of 1/2-inch plywood cut to the width of your bed frame and desired height (54"w for full, 60"w queen, 34"h). $17
  • 1/2-inch foam to cover surface area of one side of the plywood (i.e. 54" x 34", etc).$2.50
  • 3 yards of 54" batting. A queen-size bag will do. $11
  • Staple gun and staples. Borrowed
  • 2-3 yards of fabric. (I bought 3 yds. and have some to spare, so 2 yds. will probably do.)$24
  • French Natural Nailhead Trim — available at Joann's Fabrics, eBay seller nails-to-you($8.50), DIY Upholstery Supply ($15). $8.50
  • Hammer or rubber mallet. Owned
Total Cost: $63!
Now, onto the steps . . .
  1. Head to Home Depot and have them cut your piece of plywood to size. They'll do it for free. If you want to screw your headboard directly into your bed, rather than hang it from the wall, you may want to have them cut you legs from the scrap plywood.
  2. Lay your plywood on the floor. Lay the foam on top of the plywood and staple it down, just in the four corners. If it's not a perfect shape, you may need to cut smaller pieces from the roll of foam and arrange them to fit.
  3. Unroll your batting and stretch it out flat across the floor. If it's already folded in two layers, leave it like that, you'll want two layers. Center the plywood, foam side down, on top of the batting, making sure there's room to fold the batting onto the backside of the plywood.
  4. Begin stapling the batting to the back side of the plywood, pulling it tautly as you go. When you reach the corners, fold them nicely like you would a present. Continue all the way around.
  5. Make sure your fabric is ironed or steamed if it has wrinkles.
  6. Lay your fabric on the floor, front side down. Lay the plywood down on top of it, foam/batting side down, with at least two or three inches of fabric around the edges of the plywood all the way around. Cut off excess fabric if needed.
  7. Begin stapling your fabric to the backside of the plywood, pulling it tautly as you go. When you reach the corners, be extra careful to fold them neatly like a present.
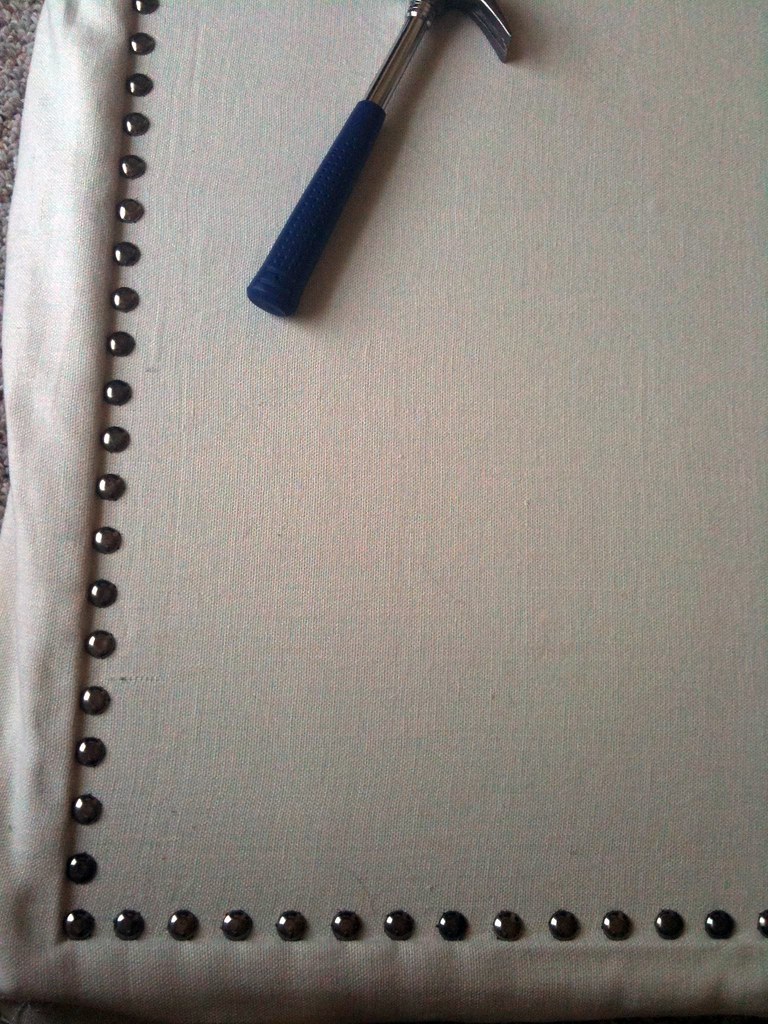
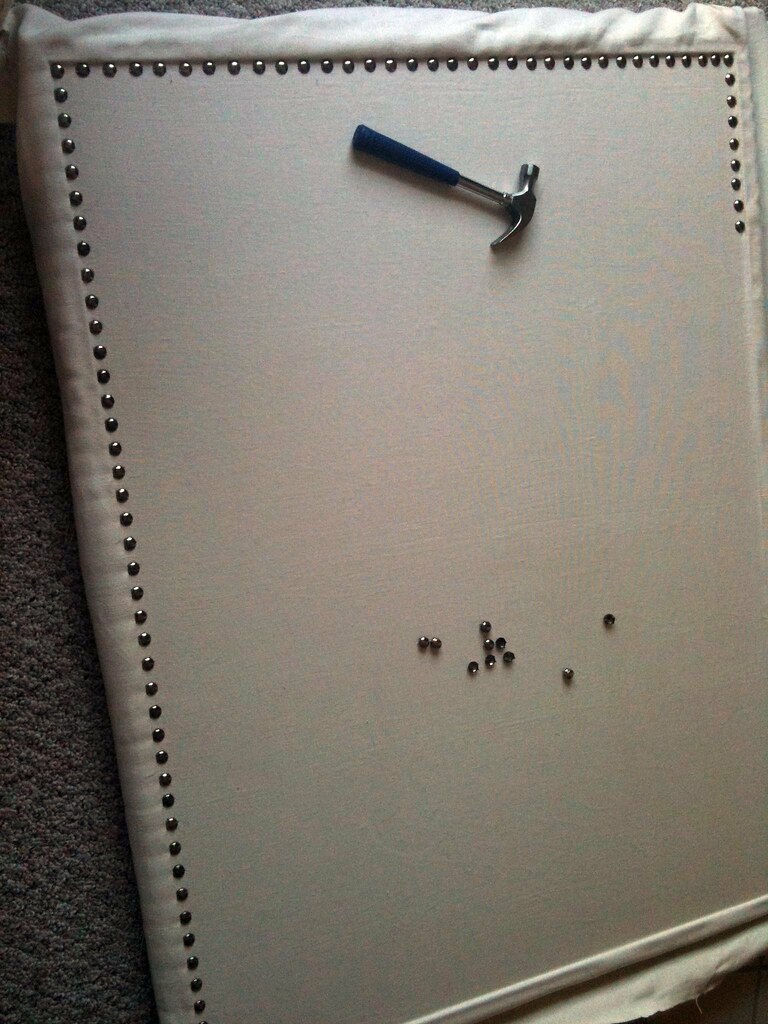
  8. Next up: the nailhead trim! The nailhead trim is basically a strip of nailhead that you only have to nail in every fifth nail. This saves a lot of time and makes lining up the nails a cinch. Decide what pattern you're going to go with ahead of time. I chose two rows of trim, but you could easily go with one, or even get more complicated. I wrapped my hammer in a sock so it wouldn't scratch the nailhead, but a rubber mallet will also work.
  9. Start at the bottom and begin nailing in the trim, checking to make sure it's a straight line as you go. When you get the corners, you may have to snip off some of the trim, and hammer in real nailheads depending on the length and width you're going for. Repeat as necessary until you've completed the trim.
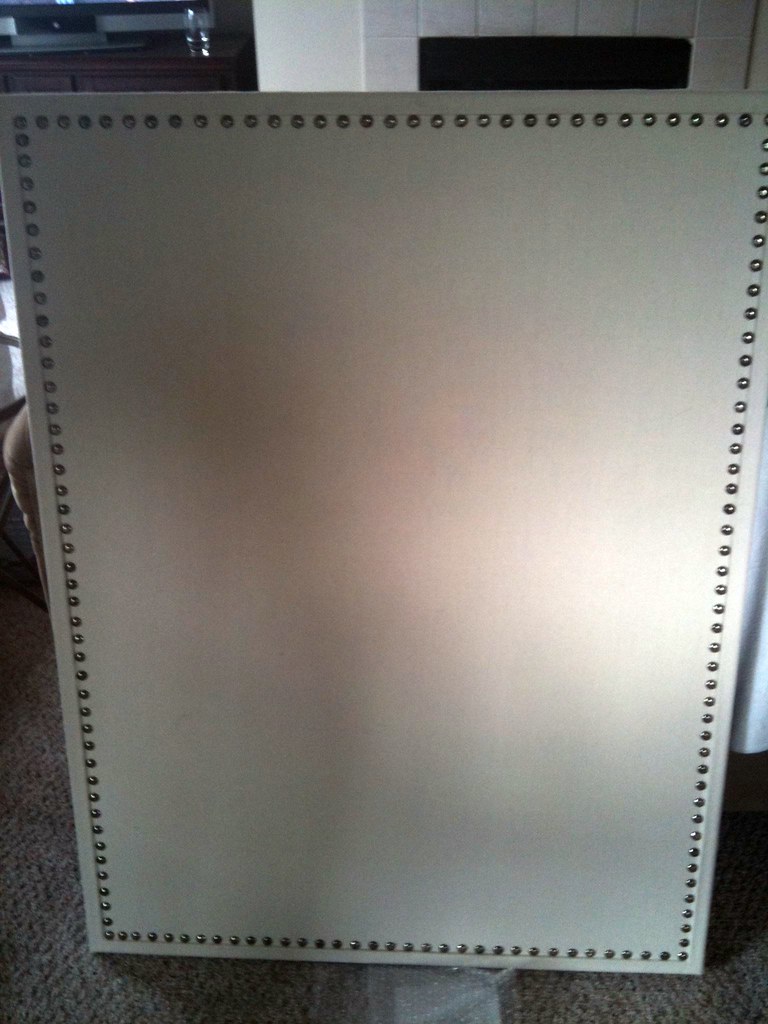
  10. Fini! If you're going to hang your headboard, I'd recommend screwing in two heavy duty D-ring picture hangers into the back of the headboard, and hanging them from a screw or hook on your wall. If you want to attach the headboard to your bed, you can screw plywood legs to the headboard and them bolt them to your bed frame.
Check out the entire project here.

Wednesday, April 28, 2010

DIY Classy Corkboard

Loved this DIY Corkboard that Bryn Alexandra recently posted.  This will be a DIY in the new house.

One of my local clients and new friend Sarah asked me if I could do something similar to Erika's fabulous inspiration board:


And I said, sure I can!

The process was actually much simpler than I thought and it turned out really nice.

The materials involved are:

Corkboard (we used a 3' x 4' from Staples)
Fabric (we used ivory linen)
Nailheads (we used these)
Hammer
Spray Adhesive
Staple gun
Iron

Steps:

1. Iron your fabric like crazy to get all the wrinkles out (especially if using linen)
2. Spray adhesive the fabric onto the cork section of the board only, leaving the moulding trim unglued.
3. Nail in the nailheads with the hammer- I measured the width between the nailheads with the width of my pinkie finger. This was easy and assured that everything was even :) Go along the line of the board's moulding trim and you will get a straight line.
4. Spray adhesive the fabric onto the moulding
5. Staple gun the fabric onto the back of the board and you're done!

I didn't take pictures of the entire process.. I grabbed my iPhone mid-way through to snap a few pictures. I'm really bad about taking pictures for my DIY projects... I know, I need to work on that. Bad blogger!


[It never fails. When you have a black dog, there will always be black dog hair in my pictures.]


The finished product!


Yes, I am aware of the terrible picture quality. But I got a promise from Sarah to get pictures of it hung :) I'll be sure to share with you when I get them!

Tuesday, April 27, 2010

While the cat is away, mice will play...

Last weekend The Dude went out of town on a "boys" weekend.  I had been planning a little DIY project as soon as I heard of his plans.  Just about everything at the bungalow is finished except for our dreaded laundry room, or should I say lack thereof.
Therefore, my plan was to construct a proper laundry room closet in our kitchen to close out and finish the space.  The closet now houses our washer and dryer along with extra sheets, laundry baskets, cleaning supplies, etc.  Not to mention, it is so much more quiet now that the combo is closed in.
The Dude was a bit shocked when he walked in the door, but overall, very thrilled!  Yay.  DIY project with lots of help from Dad for $215!

Laundry room/breakfast nook before


Laundry Room After

Monday, April 26, 2010

next project


This will be my next DIY project at the bungalow.  Rolling stools made of stumps.  My Dad just had a huge oak tree fall at the ranch and he has cut me some nice sized pieces that are just begging for a guest.
My plan is to pick up some casters at my local hardware store and seal them with water sealant.  I cant wait to get these out on our deck for summer barbeques!

Tuesday, April 13, 2010

All you need is L-O-V-E

I dont think my dude would approve of these pillow shams and I am not sure I would want them in our master bedroom.  But, aren't they sweet for a guest room or a single gal's femme apartment?  I just LOVE them!  Available for only $30 at Reverie Daydream.

Wednesday, April 7, 2010

DIY designer door


This past weekend I decided to jazz up our otherwise brown and boring sliding door to our bedroom.  Made of two hollow core doors, the idea was to eventually cover it in leather, stainless steel, and glass.  However, since we are on a tight budget, and I couldn't bear to look at the drab brown anymore, I decided to do a little DIY paintwork instead.  Im loving the outcome!

Before

We picked these hollow core doors up from our local Habitat for Humanity restore for a wopping......$3 each!  If you plan on painting them they are so easy to work with.  Its like a blank canvas.  And you cant beat the price.


1.  First, I painted the doors with 2 coats of left over paint from our bedroom.  I did not prime the doors.


2.  Then, I made a template of the squares that I wanted to make.  The picture above looks super complicated, but believe me, an idiot could pull this project off.  I used 11"x17" squares.  At the corner of each square I punched a hole in the cardboard so I could mark where my next square would begin.
3.  The key is getting the first 3 squares made.  After that, I used a level and drew lines all over the door and followed my template.


4.  After I was done taping (it took a good 6 hours), I painted over the paint with regular white paint.
5.  Then, after only about 5 minutes after I was done painting over the tape I started to peel the tape off.  Peeling while the paint isn't completely dry keeps the painters tape from sticking and also keeps the paint from running.

Project Recap:
4 rolls painters tape $0 (already owned)
leftover paint from recent projects $0
hollow core doors $6 (Habitat for Humanity Restore)
paintbruses, rollers, etc $0 (already owned)

Essentially, this project did not cost me a dime.  But, if you have none of the supplies you can see this project can still be done on a tight budget.